


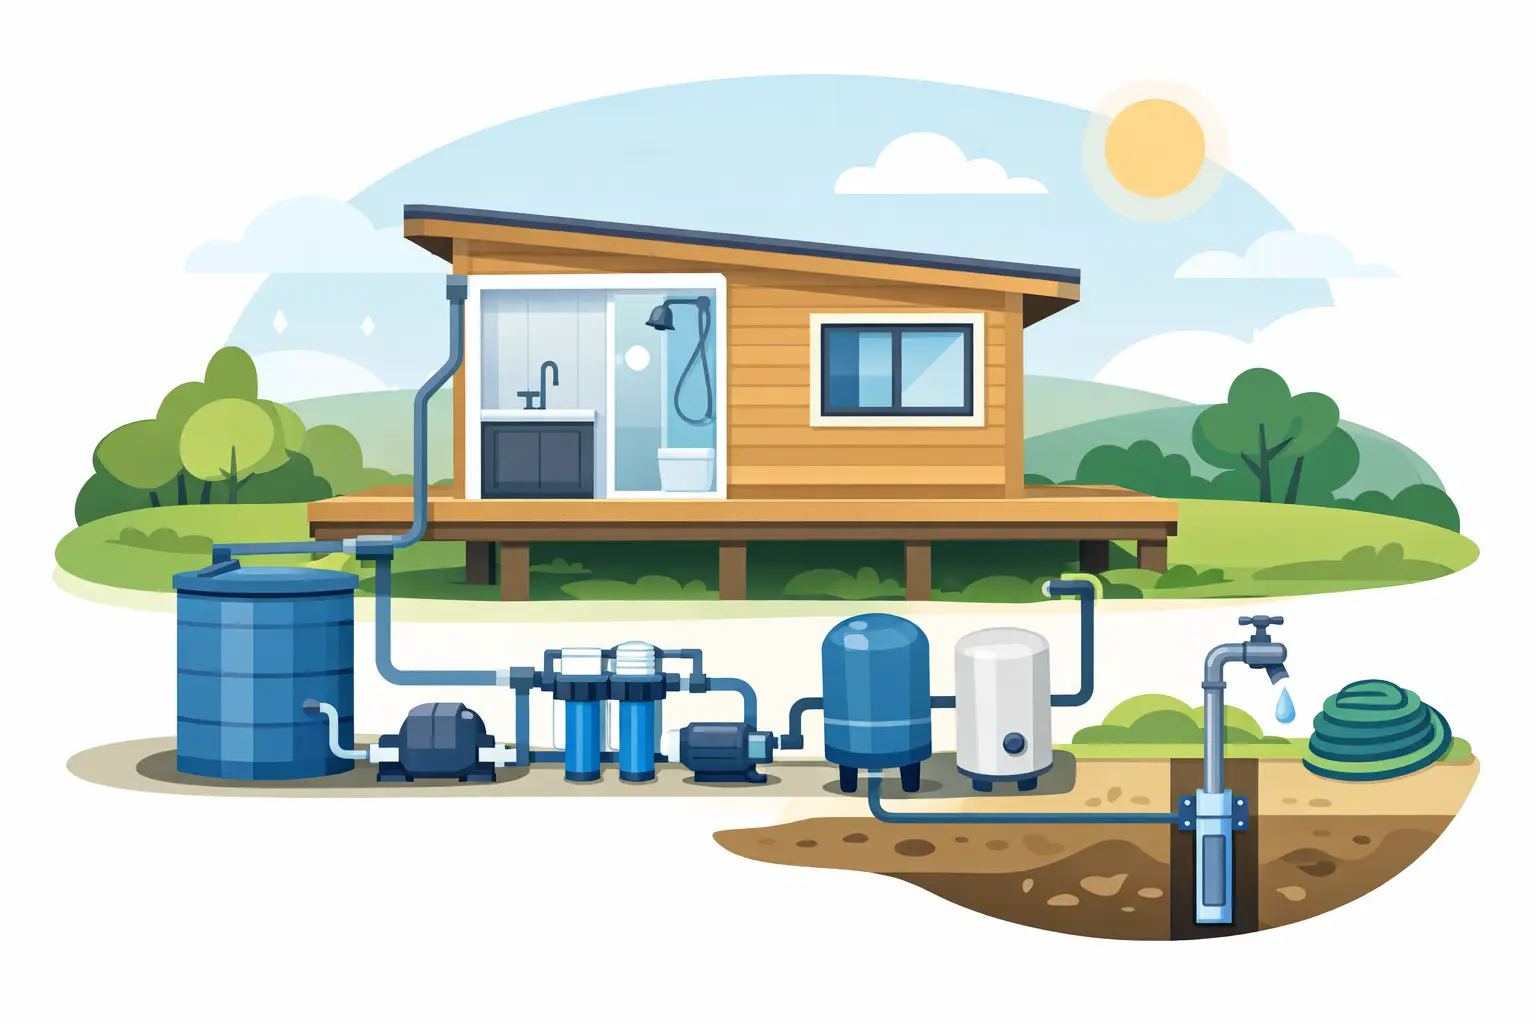
A tiny home may use less water than a conventional house, but it cannot afford a poorly planned supply. Limited storage space, compact plumbing runs and variable rainfall mean every part of a tiny home water system needs to work together: collection, storage, pumping, filtration, hot water and waste management. A system that is sized properly from the start is easier to live with, cheaper to maintain and far more dependable when the weather turns dry.
For Australian tiny homes, the right design depends on whether the home is permanently sited, frequently moved, connected to mains water, fully off-grid or used as a weekend retreat. The goal is not simply to fit the biggest tank possible. It is to match storage and equipment to real water use, available roof area and the level of water quality required.
Start With Daily Water Demand
Water storage capacity should be based on how many people will use the home and how they use water. A careful tiny-home household may use around 80 to 120 litres per person per day, while a more typical household pattern can be higher. Showers, toilets, washing machines and outdoor taps quickly change the calculation.
For a couple living in a tiny home full-time, allowing 200 litres per day gives a sensible starting point. A 5,000-litre tank may therefore provide about 25 days of supply before allowing for rainfall. That buffer can disappear quickly during dry periods, so permanent off-grid homes often benefit from larger storage where the site and budget allow.
It also pays to separate essential use from optional use. Drinking, cooking, showering and toilet flushing are daily needs. Garden watering, vehicle washing and long showers may need to be reduced when tank levels are low. Water-efficient showerheads, front-loading washing machines and dual-flush toilets make a meaningful difference without making the home uncomfortable.
Choose a Tank That Suits the Site
A water tank is the foundation of a tiny home water system. Poly tanks are a practical choice for many sites because they are durable, lightweight compared with steel, and available in shapes that work around tight access and small building footprints. Slimline tanks can sit alongside a tiny home or boundary, while round tanks generally provide more economical storage where space is available.
A transportable tiny home has different requirements from a fixed dwelling. Weight matters when the tank is mounted on or close to the trailer. One litre of water weighs one kilogram, so a full 2,000-litre tank adds two tonnes before allowing for the tank itself. In many cases, it is safer and more practical to position the main tank on a stable pad beside the home rather than carry large volumes while travelling.
Tank placement should allow for roof drainage, overflow management, pump access and future cleaning. Keep the tank on a level, well-prepared base that fully supports its floor. Avoid locating it where runoff can undermine the pad or where vehicles can strike pipework. A visible overflow path away from the tiny home is essential during heavy rain.
Where drinking water is collected from a roof, use food-grade tank materials and components suited to potable water. Covered inlets, mosquito-proof screens and properly sealed access points help keep contamination out before it reaches the pump or filters.
Match tank capacity to roof catchment
A large tank is only useful if the roof can refill it. As a rough guide, one millimetre of rain falling on one square metre of roof produces one litre of water before losses. A 50-square-metre roof receiving 100 mm of rain can potentially collect about 5,000 litres.
First-flush devices, gutter losses and overflow reduce the usable figure, but the calculation shows why roof size matters. Tiny homes often have modest roof areas, so it may be worth directing water from an awning, shed or adjacent structure into the same storage system where practical and permitted. This can substantially improve water security without crowding the home with extra tanks.
Build the Collection System Properly
Rainwater quality begins at the roofline. Clean gutters, correctly sized downpipes, leaf strainers and rainheads reduce the amount of leaves, dust and debris entering the tank. This is especially relevant in coastal and rural areas, where windblown material, ash, pollen and bird droppings can build up quickly.
A first-flush diverter helps discard the initial dirty water from a rainfall event before cleaner water enters storage. It is not a substitute for tank filtration, but it is a sensible protective measure. The diverter must be sized for the roof and cleaned periodically, otherwise it becomes another neglected part of the system.
Fit a screened tank inlet and overflow to prevent mosquitoes, insects and small animals entering the tank. Check these screens regularly. A blocked overflow can force water back into gutters during a downpour, while damaged mesh can create avoidable hygiene issues.
Select a Pump for Pressure and Reliability
Most tiny homes need a pressure pump to deliver water to taps, the shower, toilet and appliances. The correct pump is determined by required flow, pressure, pipe length, elevation and the number of fixtures likely to run at once. A pump that is too small may struggle with a shower when another tap is open. A pump that is too large can cycle excessively, create noise and place unnecessary demand on batteries or solar power.
For a compact home, a quality automatic pressure pump with dry-run protection is often a practical solution. Pair it with an appropriately sized pressure vessel where suitable to reduce frequent pump starts. This can improve pressure stability and help extend pump life.
Consider where the pump will sit before buying it. Pumps make noise and vibration, which is more noticeable in a small living space. Install the unit on a firm base, use flexible connectors and place it away from sleeping areas where possible. It must remain accessible for servicing, leak checks and filter changes.
If the tiny home relies on solar power, assess the pump’s electrical draw alongside the rest of the system. A high-demand pump may be a poor match for a modest battery bank, particularly during extended cloudy weather. In this situation, efficient fixtures and considered pump selection are as valuable as additional panels.
Treat Water According to Its Intended Use
Rainwater can be suitable for household use when it is collected, stored and treated properly. The level of filtration needed depends on whether the water is used for gardens, toilet flushing, washing or drinking.
For water supplied to showers, taps and appliances, sediment filtration is commonly used to remove fine particles that can affect fixtures and appliances. For drinking water, a staged approach often makes sense: a sediment filter protects finer filtration, carbon filtration can improve taste and reduce odours, and UV sterilisation provides an additional barrier against microorganisms when the water is clear enough for the UV unit to operate effectively.
UV systems are not fit-and-forget equipment. The lamp has a service life, the quartz sleeve needs cleaning, and pre-filtration must be maintained. If filters are left unchanged, flow drops and water quality can suffer. Set a maintenance schedule at installation rather than waiting for a problem.
Not every tiny home needs the same treatment train. A home on treated mains water may only need a basic filtration setup, while an off-grid family drinking roof-collected rainwater may require more comprehensive filtration and UV sterilisation. The right answer depends on the source, local conditions and whether potable water is required at every tap.
Do Not Treat Wastewater as an Afterthought
Fresh water supply is only half the design. Tiny homes also need an approved way to manage greywater and sewage. Options can include connection to an existing sewer, a septic or onsite wastewater system, composting toilets, or holding tanks for mobile applications. Local council requirements, site conditions and occupancy all affect what is permitted.
Greywater from showers, basins and washing machines can sometimes be directed to approved subsurface irrigation systems, but soaps, soil type, slope and setbacks matter. Do not assume a simple drain to the garden is acceptable. Poor wastewater management can contaminate soil and waterways, create odours and cause costly compliance issues.
Allow for Maintenance From Day One
A good system is one that can be inspected and serviced without dismantling half the home. Leave clear access to tank lids, pump controls, filter housings, isolation valves and drain points. Label pipework where possible, particularly if rainwater, mains water and recycled water systems sit close together.
At least a few times each year, inspect gutters and screens, check for pump leaks and unusual cycling, clear debris from strainers, and examine the tank base and overflow area. Tanks also need periodic internal inspection and cleaning when sediment builds up. The timing depends on roof conditions, surrounding trees and water quality, rather than a fixed calendar rule.
For property owners who want a single point of support, North Coast Water Tanks can assist with tank, pump, filtration and accessory selection for a practical, integrated setup. Quality Assurance, compliant materials and Local Support matter most when the system is relied on every day.
A tiny home water system should give you confidence, not another daily chore. Plan for the driest weeks, protect the water before it enters the tank, and choose equipment you can maintain easily. That approach leaves more time to enjoy the independence that tiny-home living is meant to provide.